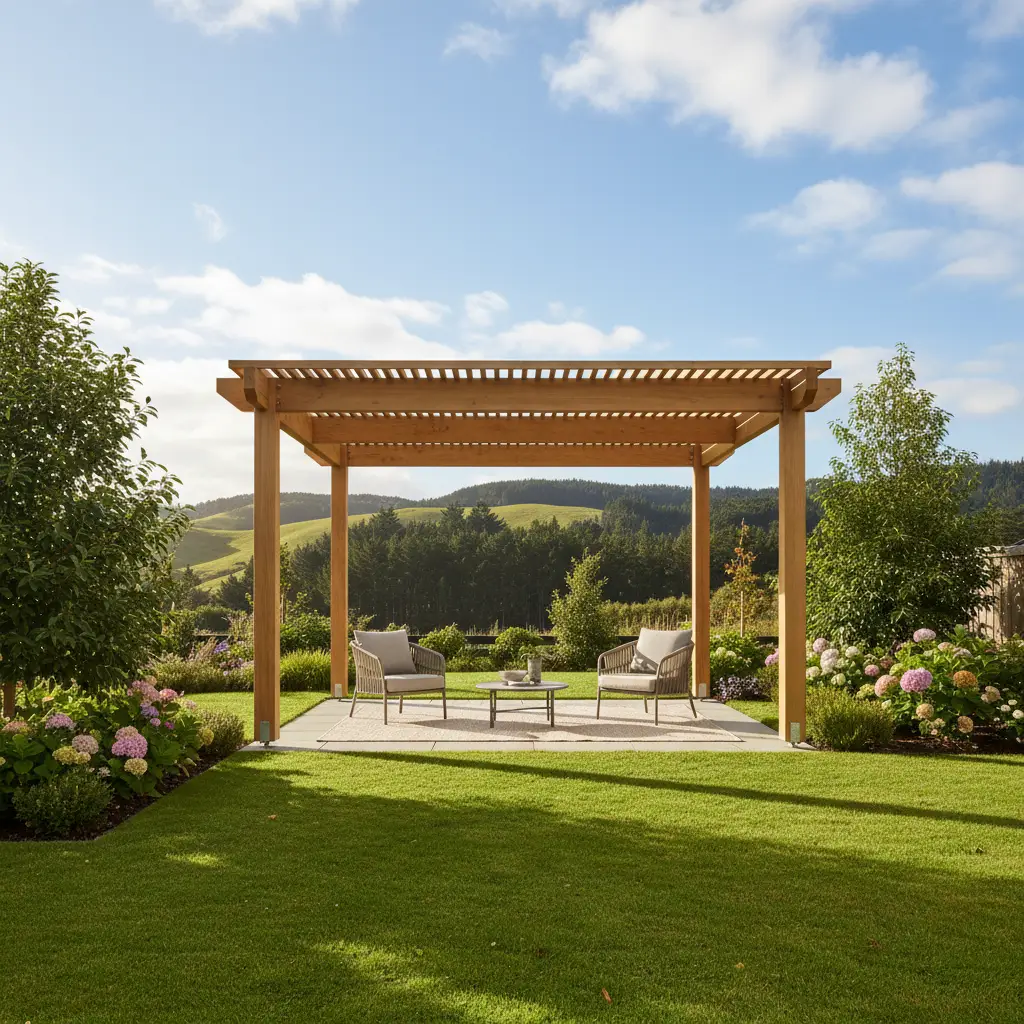
To build a pergola in NZ, start by confirming if your structure is exempt from building consent, typically if it is under 30 square metres. Select H5 treated timber for ground posts and H3.2 for bearers. Mark out the footprint, set posts in concrete, attach beams with galvanized bolts, and secure rafters for a durable, weather-resistant outdoor structure.
New Zealanders cherish their outdoor living spaces. From the classic quarter-acre section to modern urban courtyards, a pergola serves as the anchor of the Kiwi backyard, providing shade, shelter, and a defined area for entertaining. Building a pergola is a significant project that adds value to your property and enhances your lifestyle, but it requires careful planning, understanding of New Zealand Building Code regulations, and the right materials to withstand our unique maritime climate.
Do I Need Council Consent for a Pergola in NZ?
Before breaking ground, the most critical question to answer is whether your project requires a building consent. In New Zealand, the Building Act 2004 provides specific exemptions for low-risk building work, which often includes pergolas, provided they meet strict criteria.
Generally, under Schedule 1 of the Building Act, you do not need a building consent for a pergola if:
- It is a detached structure: If the pergola is freestanding and does not exceed 30 square metres in floor area.
- It is attached to an existing building: If the pergola is on the ground floor and does not exceed 20 square metres.
- It is lightweight: If you are using a lightweight roofing material (like polycarbonate or shade cloth) or no roof at all (open battens).
However, regardless of consent exemptions, all building work must comply with the NZ Building Code. This includes structural stability and stormwater management. Furthermore, you must adhere to your local council’s Unitary or District Plan regarding:
- Boundary Setbacks: Usually, you cannot build within 1 metre of a boundary, or you may need to satisfy “daylight recession planes” (height relative to boundary distance).
- Site Coverage: There are limits on how much of your land can be covered by structures.
Note: Always consult your local council or a professional surveyor if you are unsure. Non-compliant structures can result in fines or removal orders.
Material Comparison: Wood vs. Aluminium
Choosing the right material is pivotal for longevity and aesthetics. In New Zealand, the two primary contenders are treated timber and powder-coated aluminium.
Timber Pergolas
Wood is the traditional choice for Kiwi DIYers. It offers a natural, warm aesthetic and is generally more customizable.
- Radiata Pine (Treated): The most common building material in NZ.
- H5 Treatment: Must be used for any timber in contact with the ground (piles/posts) to resist rot and borer.
- H3.2 Treatment: Suitable for timber exposed to the weather but not in ground contact (rafters, beams, battens).
- Macrocarpa: A naturally durable timber that doesn’t require chemical treatment if high-grade heartwood is used. It offers a rustic look but is more expensive and can be prone to movement (twisting) if not seasoned correctly.
- Cedar: Premium, lightweight, and naturally weather-resistant. It silvers beautifully over time but comes at a high price point.
Aluminium Pergolas
Aluminium is gaining popularity for modern homes, particularly for “louvre roof” systems.
- Pros: Low maintenance (no painting or staining), rust-resistant (ideal for coastal zones), and sleek modern lines.
- Cons: harder to cut and customize on-site for DIYers; usually sold as pre-fabricated kits.
DIY vs. Professional Installation
Should you build it yourself or hire a builder? This decision often comes down to budget, skill level, and the complexity of the design.
The DIY Route
Building a pergola is considered an intermediate-level DIY project. If you are comfortable using a circular saw, spirit level, and drill, and you understand basic geometry (squaring a site), you can save significantly on labour costs.
- Estimated Savings: You can save 40-50% of the total cost by removing labour fees.
- Time Commitment: A standard 3m x 3m pergola typically takes two people a full weekend to erect.
Professional Installation
Hiring a Licensed Building Practitioner (LBP) is recommended if:
- The design involves heavy structural loads or spans.
- You are attaching the pergola to a house with weathertightness concerns (penetrating the cladding).
- You require complex council consent documentation.
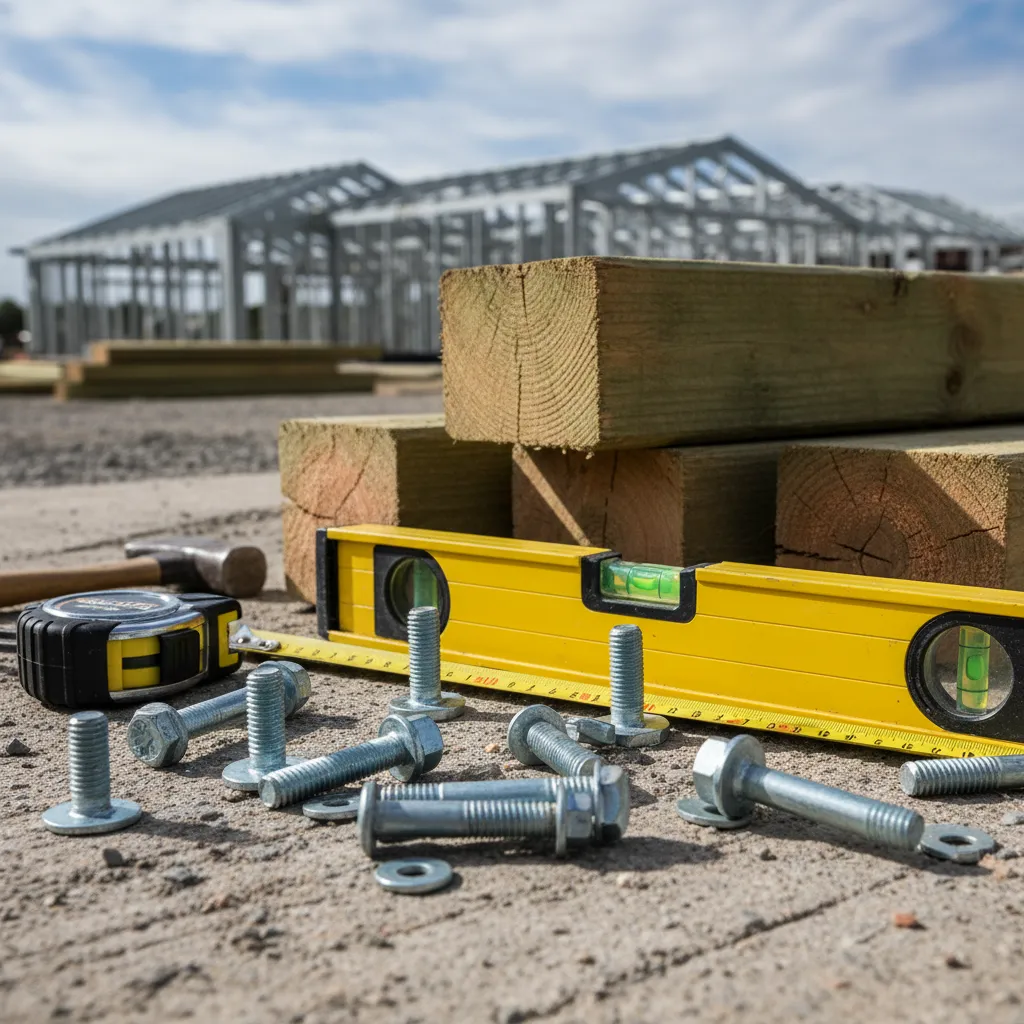
Essential Tools and Materials
To build a standard timber pergola, ensure you have the following gear ready:
Tools
- Post hole borer (hire this to save your back) or spade
- Circular saw and/or Drop saw (Mitre saw)
- Cordless Drill and Impact Driver
- Spirit level (long, preferably 1.2m or longer)
- String line and spray paint
- Ladder
- Spanners and Socket set
Materials
- Posts: 100x100mm or 125x125mm H5 Treated Pine.
- Beams/Bearers: 150x50mm or 200x50mm H3.2 Treated Pine (sized according to span tables in NZS 3604).
- Rafters: 150x50mm H3.2 Treated Pine.
- Concrete: Premixed builders mix (approx. 2 bags per post).
- Hardware: M12 Galvanized bolts, washers, and nuts; galvanized framing nails or bugle screws; joist hangers (optional).
The Building Process Explained: Step-by-Step
This guide outlines the construction of a freestanding timber pergola using the “posts-in-ground” method, which provides excellent stability.
Step 1: Planning and Layout
Accurate setting out is the difference between a professional finish and a wonky structure.
- Determine Location: Identify the four corners of your pergola.
- Use String Lines: Set up batter boards and string lines to mark the perimeter.
- The 3-4-5 Rule: To ensure your corners are perfectly square (90 degrees), measure 3 units along one string line, 4 units along the adjacent line. The diagonal distance between these points should be exactly 5 units.
- Mark Post Holes: Once square, use spray paint to mark the ground where the post holes will be dug.
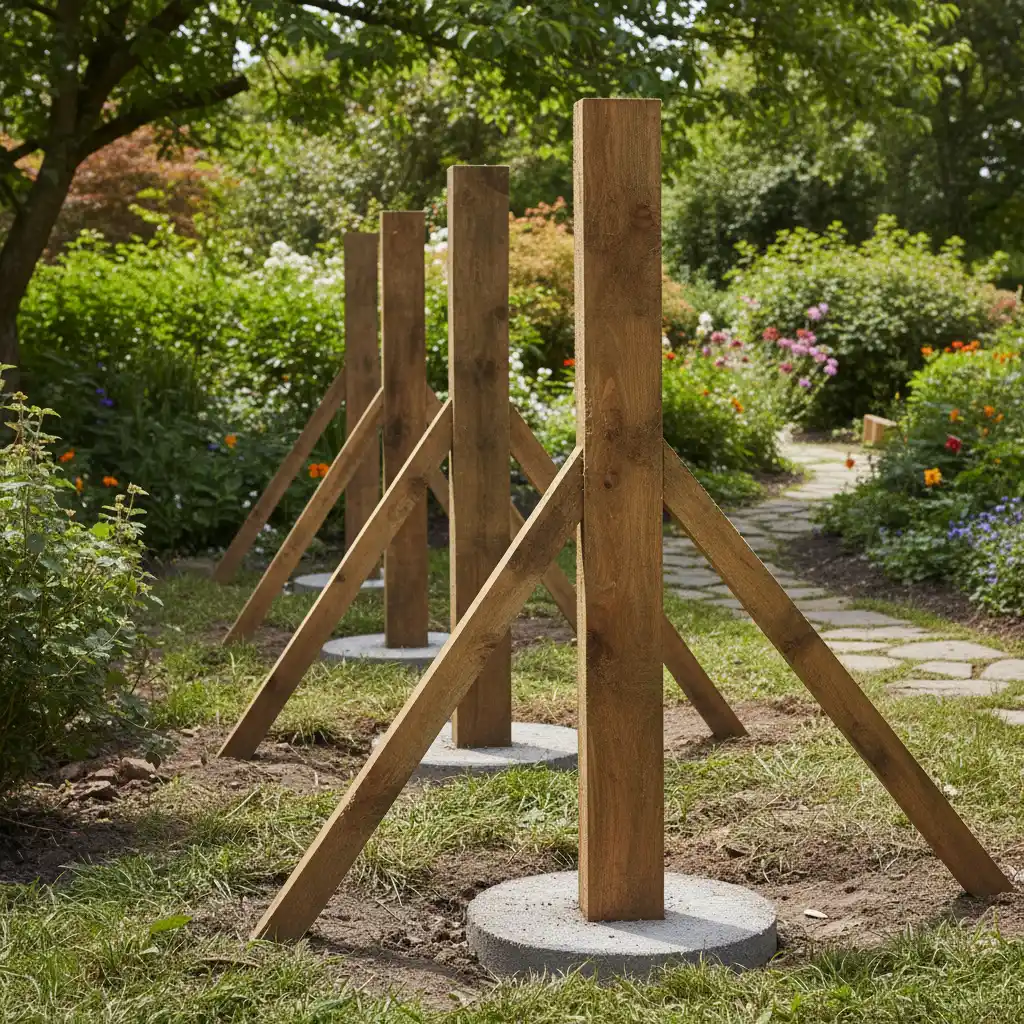
Step 2: Digging and Setting Posts
The foundation is key to structural integrity.
- Digging: Dig holes at least 600mm deep (ideally 900mm for higher structures or wind zones) and 300mm x 300mm wide.
- Gravel Base: Place a 100mm layer of gravel at the bottom of the hole for drainage.
- Positioning: Place your H5 posts into the holes. Brace them with temporary timber stakes to hold them plumb (vertical).
- Concreting: Mix your concrete and pour it into the hole around the post. Slope the top of the concrete slightly away from the timber to shed water.
- Wait: Allow the concrete to cure for at least 24-48 hours before attaching heavy beams.
Step 3: Attaching Beams (Bearers)
Once the posts are solid, you can install the main support beams.
- Establish Height: Determine the desired head height (usually 2.4m). Mark this level on all posts using a water level or laser level.
- Cut Posts: Cut the tops of the posts off at the mark, or if you prefer the posts to extend past the beams, mark where the beams will sit.
- Install Beams: Clamp the beams to the posts. Drill through both the beam and the post using a long auger bit.
- Fixing: Secure with two M12 galvanized bolts per connection point. Use washers on both sides to prevent the nut/head sinking into the timber.
Step 4: Installing Rafters
Rafters sit across the beams to create the “roof” structure.
- Spacing: Mark out rafter spacing on your beams. Typically, rafters are spaced 600mm to 900mm apart.
- Fixing Methods:
- Skew Nailing/Screwing: Driving fasteners at an angle through the rafter into the beam.
- Bugle Screws: Driving a long batten screw down through the top of the rafter into the beam.
- Hurricane Ties/Brackets: Using metal connectors for high wind zones (recommended in NZ).
- Overhang: Allow rafters to overhang the beams by 200-300mm for a traditional look. You can cut a decorative profile on the ends of the rafters.
Step 5: Roofing and Finishing
You can leave the rafters open, add battens for partial shade, or install a solid roof.
- Battens: Run smaller timber (e.g., 50x50mm) perpendicular to rafters to increase shade.
- Clear Roofing: If installing polycarbonate or acrylic sheets, ensure you install purlins (cross supports) at the frequency recommended by the manufacturer (usually every 800mm). Always use proper roofing screws with washers.
- Painting/Staining: Apply a high-quality oil or stain immediately. In NZ’s high UV environment, unpainted timber will turn grey and crack within a year.

Maintenance for NZ Conditions
New Zealand’s climate is harsh on outdoor structures. High UV levels, salt spray in coastal areas, and high rainfall mean maintenance is non-negotiable.
- Annual Wash: Wash the structure down with a mild detergent and soft brush to remove mould, moss, and salt deposits.
- Re-staining: Stain generally needs reapplying every 2-3 summers. Paint may last 5-10 years but requires more prep work to recoat.
- Check Fixings: Inspect bolts and screws annually. Tighten any that have loosened as the timber shrinks and swells with the seasons.
- Clear Gutters: If your pergola is roofed and has guttering, keep it clear of leaves to prevent overflow and water damage.
People Also Ask
How much does it cost to build a pergola in NZ?
A DIY timber pergola typically costs between $150 and $300 per square metre for materials. Professional installation can range from $500 to $1,000+ per square metre depending on materials (timber vs aluminium) and complexity.
How deep should pergola posts be in NZ?
Pergola posts should be embedded at least 600mm into the ground for standard structures. For higher structures or in high wind zones, 900mm to 1.2m depth is recommended to provide adequate leverage against wind uplift.
Can I build a pergola next to my boundary fence?
Generally, structures must be at least 1 metre from the boundary. However, pergolas are often exempt if they do not impede the neighbour’s light (daylight recession planes). Always check your local District Plan as rules vary between councils like Auckland, Wellington, and Christchurch.
What is the best timber for a pergola in NZ?
H5 treated Radiata Pine is best for ground posts due to its rot resistance. For above-ground framing, H3.2 treated Pine is the standard. For a premium natural look, Macrocarpa or Cedar are excellent choices but require more maintenance or higher initial investment.
Do I need a consent for a pergola with a roof?
If the roof is made of lightweight material (like clear plastic or polycarbonate) and the structure is under 20sqm (attached) or 30sqm (detached), it is often exempt. However, adding a heavy tiled roof usually requires consent and engineering.
How do I attach a pergola to my house?
Attaching a pergola to a house (ledger board) requires fixing through the cladding into the structural framing of the house. This carries weathertightness risks. It is highly recommended to use a stringer with spacers to allow water drainage behind it, or hire a professional to ensure the house’s watertight integrity is not compromised.