The cost of a pergola with roof in New Zealand typically ranges from $3,000 to $6,000 for a standard DIY kit using polycarbonate roofing and treated timber. Conversely, hiring a professional builder generally costs between $8,000 and $25,000+, depending on the complexity, high-end materials like aluminium or louvres, and necessary council consents.
Adding a covered outdoor structure is one of the most effective ways to extend your living space and increase property value in New Zealand. However, the price gap between a “do-it-yourself” project and a professionally managed build can be substantial. This guide breaks down every dollar, hour, and risk factor involved in the decision.
What is the average cost of a pergola with roof in NZ?
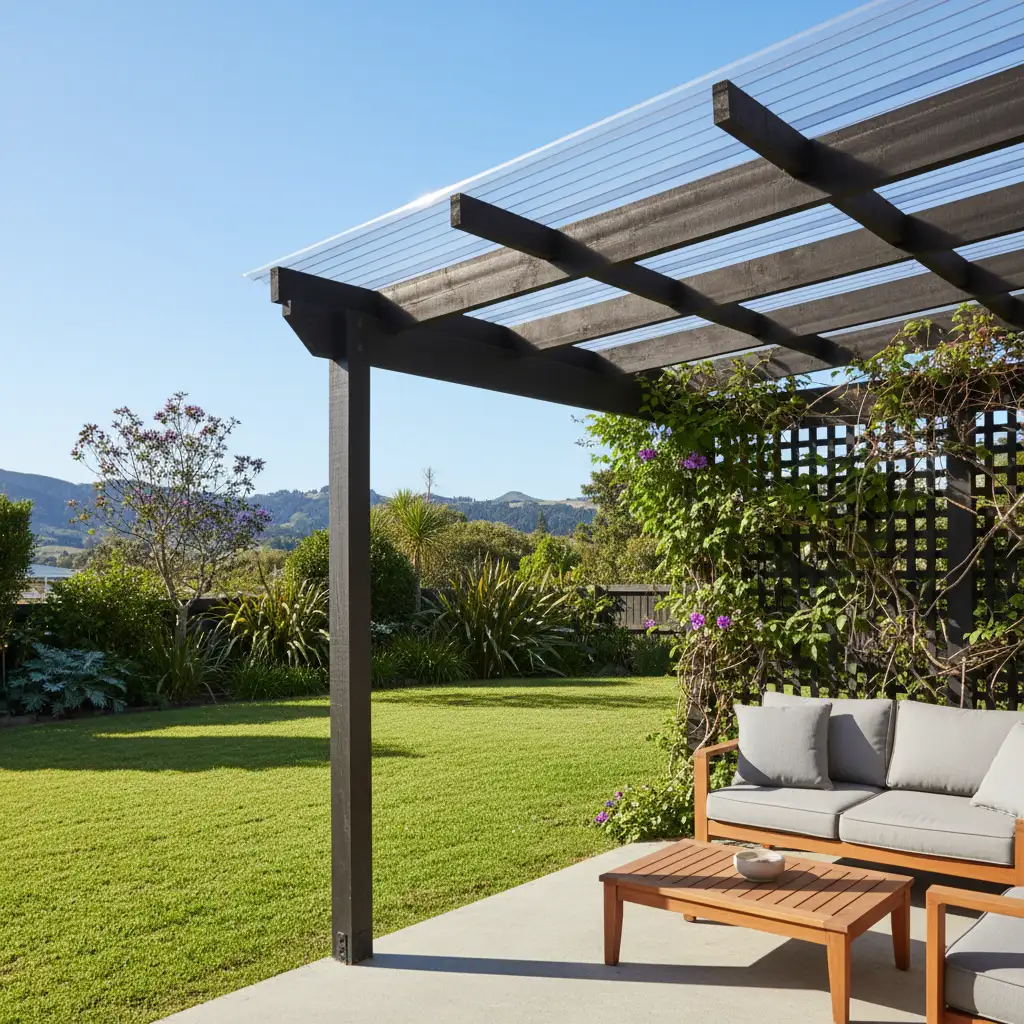
When budgeting for the cost of a pergola with roof, it is essential to distinguish between the raw materials and the finished installed product. In the New Zealand market, prices fluctuate based on wind zone requirements, timber grades (such as H3.2 vs H5), and roofing materials (Colorsteel vs Polycarbonate).
Cost Scenarios
- Basic DIY (3m x 3m): Using standard treated pine and corrugated PVC roofing.
Estimated Cost: $2,500 – $3,500 NZD. - Mid-Range DIY Kit (4m x 4m): Powder-coated aluminium frame with twin-wall polycarbonate roofing.
Estimated Cost: $4,500 – $7,500 NZD. - Professional Build (Timber): Custom design, H5 posts, premium clear roofing, painted finish.
Estimated Cost: $9,000 – $15,000 NZD. - High-End Professional (Louvre System): Motorised opening roof, integrated lighting, rain sensors.
Estimated Cost: $20,000 – $45,000+ NZD.
While the sticker price of a DIY kit looks attractive, it often excludes consumables (screws, concrete, sealants) and the necessary tools, which we will explore next.
Savings on Labour vs Tool Costs
The primary driver for choosing DIY is avoiding labour rates. In New Zealand, a qualified builder charges between $65 and $95+ GST per hour. For a standard 3-day build involving two builders, labour alone can cost between $3,000 and $5,000.
However, these savings are only realised if you already own the necessary equipment. If you are starting from scratch, the tool acquisition cost can eat significantly into your labour savings.
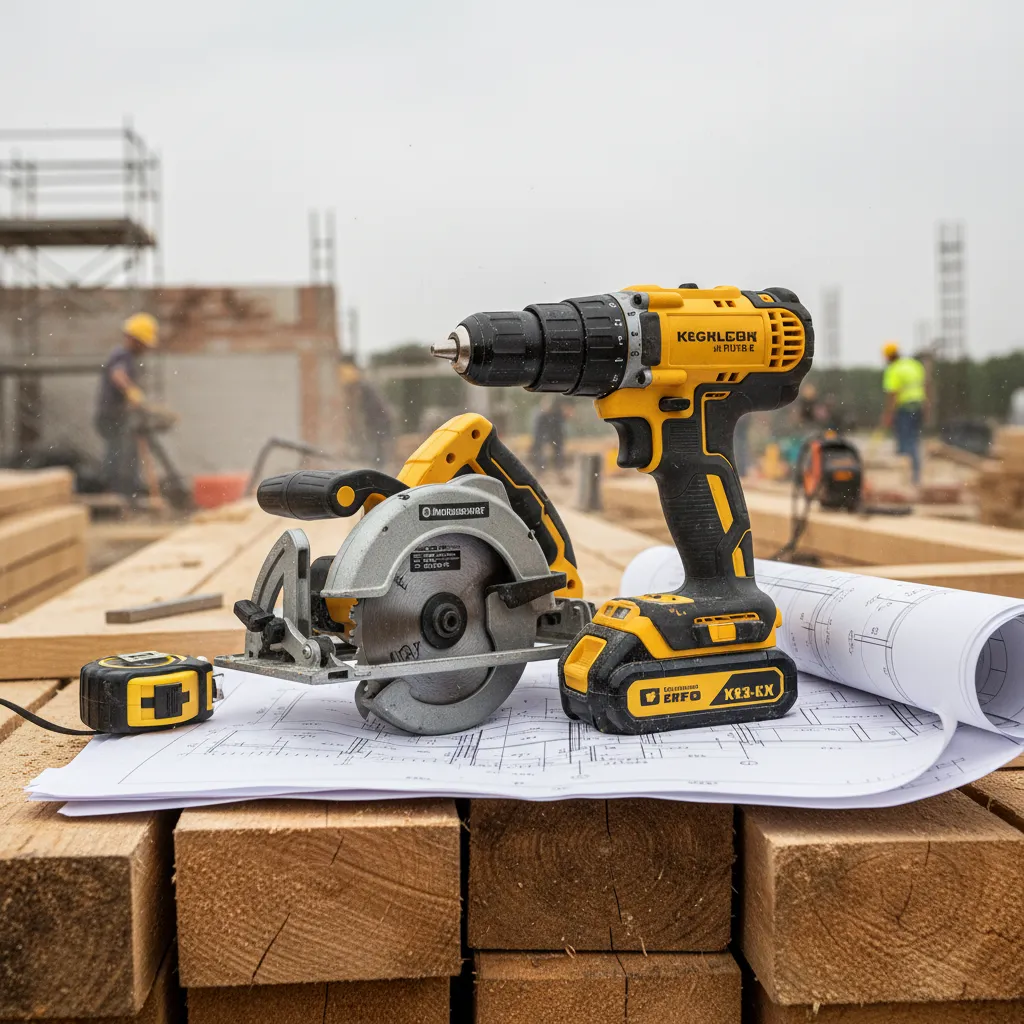
Essential Tool List and Costs
To build a structural pergola with a roof that handles NZ weather conditions, a simple hammer and saw will not suffice. You will likely need:
- Compound Mitre Saw (Drop Saw): Essential for accurate angle cuts on rafters. Cost: $400 – $900.
- Impact Driver & Drill Set: For driving long batten screws and dynabolts. Cost: $300 – $600.
- Post Hole Borer (Rental): To dig footings deep enough for high wind zones. Rental Cost: ~$150/day.
- Laser Level or Water Level: Crucial for ensuring the roof has the correct fall for drainage. Cost: $100 – $400.
- Ladders and Scaffolding: Working at height requires safety gear. Rental Cost: ~$200 – $500/week.
Verdict: If you need to buy or rent all tools, add approximately $1,000 – $1,500 to your DIY budget. If you already own a workshop, the savings on labour are genuine.
The Hidden Risks of DIY: Mistakes and Wastage
One factor rarely included in the initial cost of a pergola with roof calculation is the cost of errors. Unlike assembling flat-pack furniture, building a structural outdoor feature involves precise geometry and weatherproofing.
Common DIY Mistakes
- Incorrect Roof Pitch: A pergola roof requires a minimum fall (usually 5 degrees or more depending on the material) to ensure rainwater runs off into the guttering. If the pitch is too shallow, water will pool, causing leaks and warping the timber. Fixing this requires dismantling the entire roof structure.
- Foundation Failures: In New Zealand, wind uplift is a serious concern. If post holes are not dug to the correct depth (often 600mm-900mm) or if the concrete mix is weak, a storm can lift the roof, causing catastrophic damage to your home and fence.
- Material Wastage: Mis-cutting a 6-metre rafter or damaging a sheet of polycarbonate roofing is an expensive mistake. Professionals factor in about 5-10% wastage; DIYers should budget for 15-20%.
Financial Impact: A single major error, such as setting posts out of square, can cost hundreds of dollars in replacement timber and days of rework.
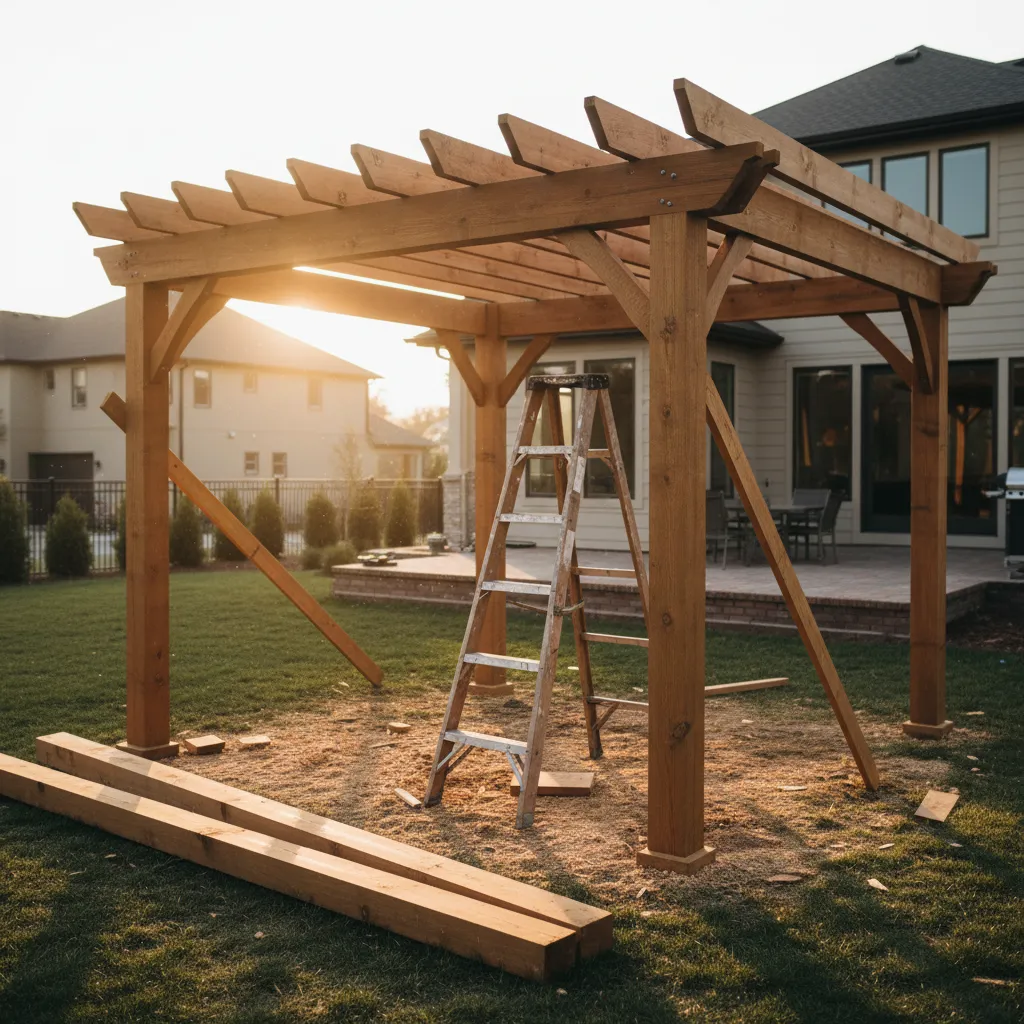
Time Investment: The Weekend Myth
Many homeowners underestimate the time required to build a quality pergola. Marketing for kitsets often claims “easy weekend assembly,” but this assumes ideal conditions and two experienced people.
Realistic Timeline for DIY
- Planning & Sourcing (1-2 Days): designing, buying materials, arranging delivery.
- Site Prep & Foundations (1 Day): Digging holes, pouring concrete, setting post anchors. Note: Concrete needs days to cure before you can frame on top of it.
- Framing (2 Days): Cutting and erecting posts, beams, and rafters.
- Roofing & Guttering (1-2 Days): Installing purlins, roofing sheets, flashings, and downpipes.
- Finishing (2 Days): Sanding, painting, or staining.
Total Time: Approximately 6 to 9 full working days. If you work on it only during weekends, your backyard could be a construction site for a month or more. For a professional team, this is typically a 3 to 4-day job.
Material Costs: Timber vs Aluminium
The material you choose significantly impacts the cost of a pergola with roof. In New Zealand, the two main contenders are treated timber and powder-coated aluminium.
Timber (Pine & Macrocarpa)
New Zealand Radiata Pine is the most cost-effective option. It must be treated to H3.2 for above-ground use and H5 for in-ground piles.
- Pros: Cheaper, easily cut and modified on-site, can be painted any colour.
- Cons: Requires regular maintenance (painting/staining), can warp or twist over time.
- Cost Impact: Low to Medium.
Aluminium
Aluminium pergolas are growing in popularity due to their sleek look and longevity.
- Pros: Rust-free, near-zero maintenance, lighter weight, modern aesthetic.
- Cons: Difficult to cut/modify if measurements are wrong, higher upfront cost.
- Cost Impact: Medium to High.
Roofing Materials
The roof itself is often the most expensive component per square metre.
- PVC Corrugated: Cheapest, but becomes brittle and yellows in UV. (~$15/m)
- Polycarbonate (Twinwall/Solid): High UV protection, durable, good light transmission. (~$40-$80/m)
- Colorsteel: Blocks all light but extremely durable and matches house roofing. (~$30-$60/m)
- Glass (Laminated): Premium look, heavy, requires engineered framing. (~$200+/m)
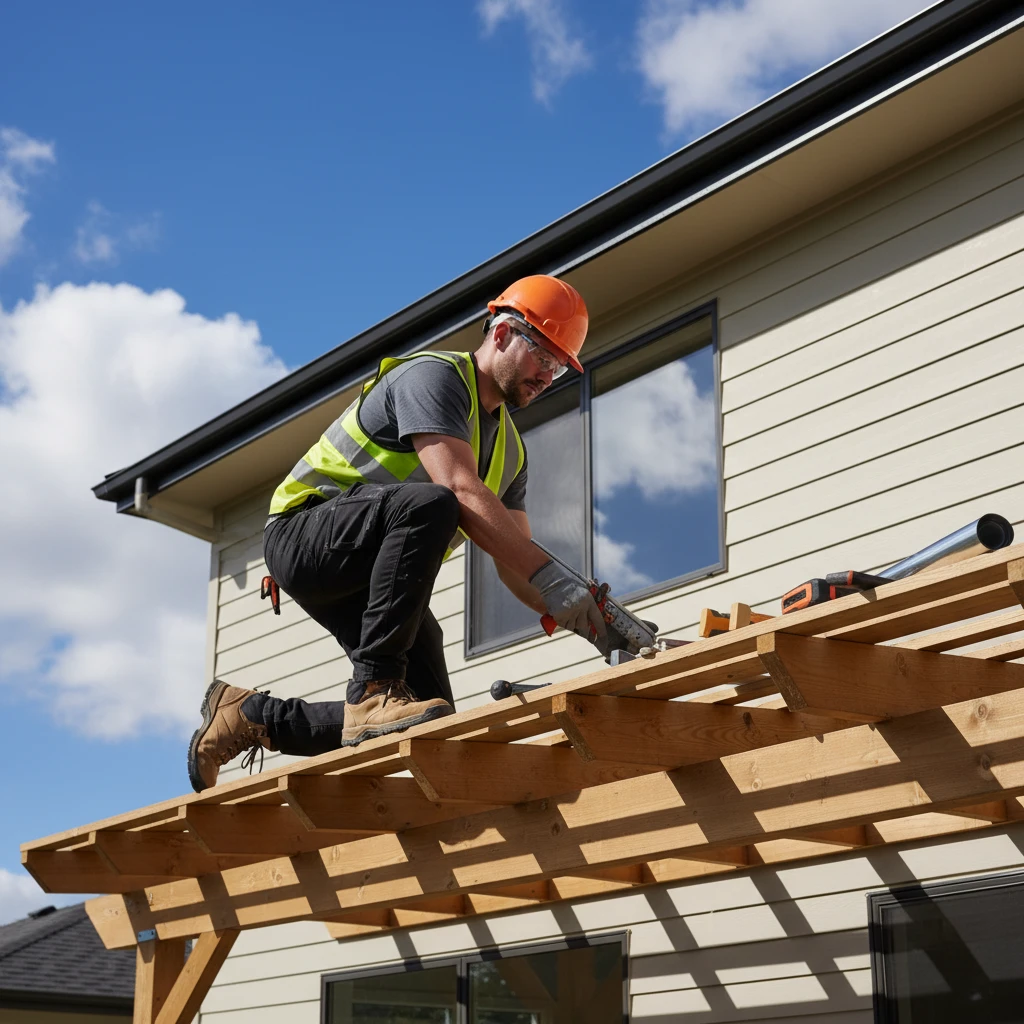
When to Call a Professional Builder
While the DIY route offers potential savings, there are specific scenarios where hiring a professional is the smarter financial and safety decision.
1. Complex Roof Integration
If you plan to attach the pergola roof to your existing house fascia or soffit, you are altering the weathertightness of your home. Improper flashing installation here can lead to internal leaks and rot in your home’s framing. Professionals carry liability insurance and know how to flash connections correctly.
2. Council Consents Required
Under NZ Building Code, many pergolas (even with roofs) are exempt from building consent if they are under 20 (sometimes 30) square metres and meet specific criteria. However, if the structure is attached to the house or close to a boundary, it may require consent. A professional builder or architect can navigate these regulations, ensuring you don’t face fines or issues when selling your property later.
3. High Wind Zones
If you live in a coastal or exposed area of New Zealand, standard kitset fixings may not meet the code. A builder will ensure the correct bracing, bolt sizes, and footing depths are used to withstand high wind loads.
Conclusion
Calculating the true cost of a pergola with roof requires looking beyond the price of timber and plastic. For a simple, detached structure in a sheltered garden, a DIY approach can save you $3,000 to $5,000, provided you have the skills and tools. However, for attached structures, high-end finishes, or complex sites, the investment in a professional builder guarantees a compliant, durable, and watertight extension to your home.
Ideally, obtain three quotes from local specialists and compare them against a fully itemised DIY shopping list (including tool hire and wastage) before making your final decision.
People Also Ask
Do I need a permit for a pergola with a roof in NZ?
generally, a pergola with a roof is considered a “covered structure.” Under the Building Act (Schedule 1), you may be exempt from a building consent if the structure is on the ground floor, does not exceed 20 square metres, and meets distance requirements from boundaries and other buildings. Always check with your local council as rules can vary.
What is the cheapest roofing for a pergola?
PVC corrugated sheets are the cheapest option, costing around $15-$20 per metre. However, they have a shorter lifespan than polycarbonate or Colorsteel and can become brittle under the harsh New Zealand sun.
How much does a louvre roof system cost in NZ?
Louvre roof systems are a premium option. Prices typically start around $1,000 to $1,500 per square metre installed. A standard 3m x 4m louvre pergola can cost between $15,000 and $25,000 depending on automation and lighting features.
Can I attach a pergola to my house fascia?
Yes, but it requires special brackets (like extenda-brackets) that attach to the rafters through the roof, rather than just the fascia board, which is not structural. This requires careful flashing to prevent leaks and is best done by a professional.
How long does a timber pergola last in NZ?
A well-built pergola using H3.2 or H5 treated pine can last 20 to 30 years. Regular maintenance, such as cleaning and re-staining or painting every 3-5 years, is essential to prevent rot and keep it looking good.
Does a pergola add value to a home?
Yes, creating a functional outdoor living space is highly desirable in the NZ property market. A covered pergola that effectively extends the living area can offer a return on investment of 50-80% and increase the property’s saleability.